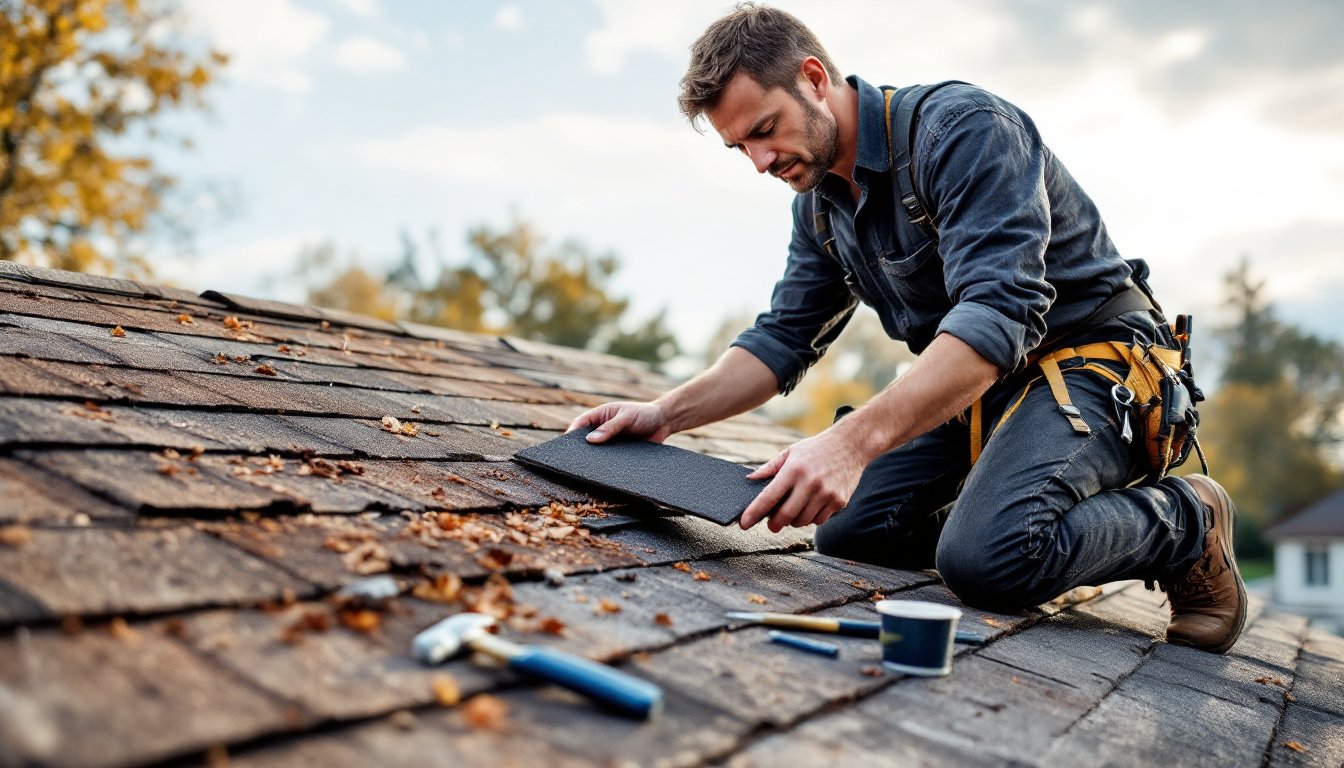
Slate roofs can last 75 to 150 years, but individual tiles don’t always make it that long. A cracked or missing slate doesn’t mean the entire roof is shot, it means a homeowner needs to address a repair before water finds its way into the sheathing. Unlike asphalt shingles that can be patched on a Saturday morning, slate requires a different approach. The tiles are heavy, brittle, and installed with techniques that date back centuries. But with the right tools, a careful hand, and respect for the material, many slate repairs are within reach of a confident DIYer. This guide walks through diagnosing damage, sourcing materials, and executing repairs that maintain the integrity and longevity of a slate roof.
Table of Contents
ToggleKey Takeaways
- Slate roofs can last 75 to 150 years, but individual tiles fail from thermal expansion, fastener corrosion, foot traffic, or weather damage, requiring timely slate roof repair to prevent water penetration.
- Assess damage before committing to repairs—if fewer than 20% of tiles are damaged and underlayment is sound, spot repairs make sense; otherwise, professional evaluation or full replacement may be necessary.
- Slate roof repair requires specialized tools like a slate ripper, slate cutter, roofing ladder with standoff brackets, and materials like copper or stainless steel nails to safely and effectively replace broken tiles.
- Use a copper bib or slate hook beneath replacement tiles when direct nailing isn’t possible, and ensure new slate overlaps the course below by at least 3 inches to maintain water-shedding integrity.
- Flashing at valleys, chimneys, and dormers fails faster than slate itself—replace corroded step and counter flashing with copper or lead-coated copper, and seal joints with polyurethane-based sealant rather than silicone.
- Safety is critical when working on slate roofs: use fall-arrest harnesses, roof ladders with standoff brackets, step only on overlapped lower thirds of tiles, and never work alone or in wet conditions.
Why Slate Roofs Crack and Fail Over Time
Slate is a metamorphic rock, durable, fireproof, and naturally water-resistant. But it’s not indestructible.
Most failures stem from thermal expansion. Slate expands and contracts with temperature swings, and fasteners or flashing that don’t allow movement can cause stress fractures. In freeze-thaw climates, water that seeps into microfractures expands when it freezes, splitting tiles from the inside.
Fastener failure is another culprit. Older roofs used steel or iron nails that rust out after 50 to 80 years. When the fastener corrodes, the slate loses its anchor and can slide or break. Copper or stainless steel nails last much longer, but many legacy installations didn’t use them.
Footing traffic on slate roofs can crack tiles, especially if someone steps on an unsupported edge. Even a careful roofer can snap a weathered tile. Hail, falling branches, and debris also take their toll. A single broken slate may not leak immediately, the overlapping design of slate roofing provides redundancy, but water eventually finds a path once multiple tiles fail in proximity.
Finally, the underlayment and flashing deteriorate faster than the slate itself. When felt paper or metal flashing corrodes, leaks develop even if the slate is intact.
Assessing the Damage: When to Repair vs. Replace
Not every damaged slate justifies a full roof replacement. Start with a visual inspection from the ground using binoculars. Look for missing tiles, visible cracks, or tiles sitting askew. Check the attic for water stains, daylight penetration, or damp insulation.
If fewer than 20% of the tiles are damaged and the underlayment is sound, spot repairs make sense. If large sections are failing, fasteners are corroding across the roof, or the decking shows rot, a full replacement or professional assessment is warranted.
Age matters. A 60-year-old slate roof with localized damage can be patched. A 120-year-old roof nearing the end of its service life may have brittle tiles throughout, and repairs become a losing battle.
Hiring a professional for assessment is often wise. Slate roofing specialists understand load distribution, fastener types, and how to walk on slate without causing further damage. If structural repairs are needed, like replacing decking or reinforcing trusses, that’s beyond DIY scope and may require permits. Professionals also carry liability insurance, which matters when working at height on a fragile surface.
For homeowners seeking professional slate repair services, local contractors experienced with historic materials can provide estimates and code-compliant work.
Essential Tools and Materials for Slate Roof Repair
Slate repair requires specialized tools. Don’t attempt this with a standard roofing hammer and asphalt shingle nails.
Tools:
- Slate ripper: A flat steel tool with a hooked end, used to cut or pull old nails without removing surrounding tiles. This is non-negotiable for removing broken slates.
- Slate cutter or carbide scoring tool: For trimming replacement tiles to size. A wet saw with a diamond blade works but generates dust.
- Roofing ladder with standoff brackets: Keeps weight off the roof surface.
- Soft-soled shoes or roof pads: Reduces point loads on brittle slate.
- Pry bar, hammer, nail punch: For fastener removal and installation.
- Cordless drill with masonry bit: If pre-drilling nail holes in thick slate.
Materials:
- Replacement slate tiles: Match thickness, color, and texture. Salvaged slate from architectural supply yards often provides a better match than new stock for older roofs.
- Copper or stainless steel roofing nails: 1½ to 2 inches, depending on slate thickness and substrate. Never use galvanized steel, it rusts.
- Copper bib or slate hook: A small metal strip used to secure replacement tiles when direct nailing isn’t possible.
- Roof sealant or slate adhesive: Minimal use, only for edge repairs or securing bibs. Over-reliance on sealant is poor practice.
- Roofing felt or synthetic underlayment: If repairing underlayment during tile replacement.
Sourcing slate that matches the existing roof can be tricky. Many regional quarries have closed, so exact matches require hunting through salvage yards or specialty suppliers.
Step-by-Step Guide to Replacing Broken Slate Tiles
Replacing a broken slate tile is a careful process. Rushing it cracks adjacent tiles.
1. Remove the damaged slate.
Slide the slate ripper under the broken tile and hook it around the nail shank. Tap the ripper’s handle with a hammer to cut or pull the nail. Repeat for the second fastener (slate is typically nailed twice). Slide the broken pieces out.
2. Inspect the underlayment.
Check the exposed felt or underlayment for tears or rot. If damaged, cut a patch of roofing felt and slide it under the surrounding slates. This maintains the water barrier.
3. Trim the replacement slate.
Measure the opening and cut the new slate to size using a slate cutter or scoring tool. Slate should fit snugly but not force surrounding tiles apart. Bevel the top edges slightly so the tile slides in without catching.
4. Install a copper bib or slate hook.
Because the original nail holes are buried under overlapping slates, direct nailing isn’t possible. Instead, nail a copper bib, a 3-inch strip of copper flashing, to the roof deck just below the gap, leaving 2 inches exposed. The replacement slate will rest on this bib.
5. Slide the new slate into place.
Position the replacement tile so it aligns with adjacent slates. The bib holds it from below. If the roof has a steep pitch, a small dab of roofing sealant on the bib’s exposed tab can prevent sliding, but don’t rely on adhesive as the primary fastening method.
6. Check alignment and lap.
Ensure the new slate overlaps the course below by at least 3 inches (standard for most slate roofs). The side joints should be offset from the joints in the course below to maintain water-shedding integrity.
This technique works for individual tile replacement. For comprehensive roof repair guidance, homeowners can explore maintenance strategies for various roofing materials.
Fixing Leaks and Flashing Issues on Slate Roofs
Slate itself rarely leaks, it’s the intersections that fail. Valleys, chimneys, dormers, and skylights are common trouble spots.
Flashing repairs require removing surrounding slate to access the metal. For chimney flashing, the step flashing (small L-shaped pieces tucked under each slate course) and counter flashing (embedded in the chimney mortar) must both be intact. If step flashing is corroded, each piece needs replacement, which means pulling multiple slates in sequence.
Use copper or lead-coated copper flashing, both outlast aluminum and galvanized steel. When reinstalling flashing, ensure each piece overlaps the one below by at least 3 inches. Seal joints with a polyurethane or butyl-based sealant, not silicone, which doesn’t adhere well to metal.
Valley repairs are trickier. Open valleys (where metal is visible between slate courses) can be patched if the metal isn’t extensively corroded. Closed or woven valleys (where slate overlaps) require removing tiles on both sides to access the underlayment and flashing.
If a leak is traced to fastener holes, the surrounding slate may need replacement. Water that migrates through a nail hole can rot the decking below. According to seasonal maintenance advice, inspecting flashing annually prevents small issues from becoming structural problems.
Ice dams also plague slate roofs in cold climates. While slate itself isn’t damaged by freezing, ice buildup can lift tiles or force water under the lap. Installing heat cables along eaves or improving attic insulation and ventilation reduces ice dam formation.
Safety Precautions for Working on a Slate Roof
Slate roofs are steep, slippery, and unforgiving. A broken tile is a nuisance: a fall is life-threatening.
Use a roof ladder with standoff brackets. This distributes weight and keeps the ladder from resting directly on slate. Anchor the ladder securely at the ridge.
Wear a fall-arrest harness tied to a roof anchor or sturdy chimney. OSHA requires fall protection for residential work above 15 feet, and many jurisdictions enforce this for DIY work as well.
Step only on the overlapped lower third of each slate tile, where it’s supported by the tile below. Stepping on the exposed upper edge can snap it. Use roof pads or plywood walkways to distribute weight.
Check weather conditions. Morning dew, frost, or wet slate is treacherous. Work only in dry, calm conditions. Wind can destabilize ladders and blow tools off the roof.
Wear soft-soled boots, safety glasses, and gloves. Broken slate edges are razor-sharp. If cutting slate, a dust mask or respirator is essential, silica dust from slate is a serious respiratory hazard.
If the roof pitch exceeds 8:12 (8 inches of rise per 12 inches of run), or if the homeowner isn’t comfortable with heights, hire a professional. Many roofing contractors reviewed on platforms specialize in steep-slope and historic slate work.
Never work alone. A second person on the ground can stabilize ladders, hand up tools, and call for help if something goes wrong.
Conclusion
Slate roofs reward careful stewardship. A few broken tiles addressed promptly can prevent water damage that costs thousands to remediate. The techniques aren’t complicated, but they demand patience, the right tools, and respect for the material. For isolated repairs, a methodical DIYer can extend a slate roof’s service life by decades. For systemic issues, widespread fastener failure, structural concerns, or extensive flashing work, bringing in a slate specialist is the smarter play. Either way, the investment in proper repair preserves one of the most durable roofing materials ever used.