When the GE refrigerator ice maker stops producing ice on a hot summer day, it’s more than an inconvenience, it’s a call to action. Before shelling out $150–$300 for a service call, homeowners can tackle most ice maker issues themselves with basic tools and a systematic approach. GE Profile refrigerator ice makers share common failure points across models, from clogged water lines to faulty modules. This guide walks through diagnosis and repair step-by-step, saving both time and money while building real troubleshooting skills.
Table of Contents
ToggleKey Takeaways
- Most GE refrigerator ice maker repair issues can be resolved by homeowners without professional help using basic tools and systematic troubleshooting, saving $150–$300 on service calls.
- Common ice maker failures include no ice production, misshapen cubes, constant cycling without ejecting, leaking water, and unusual noises—each signaling different underlying problems that require specific diagnostic steps.
- Always unplug the refrigerator and shut off the water supply before beginning any GE ice maker repair to prevent electrical shock and water damage.
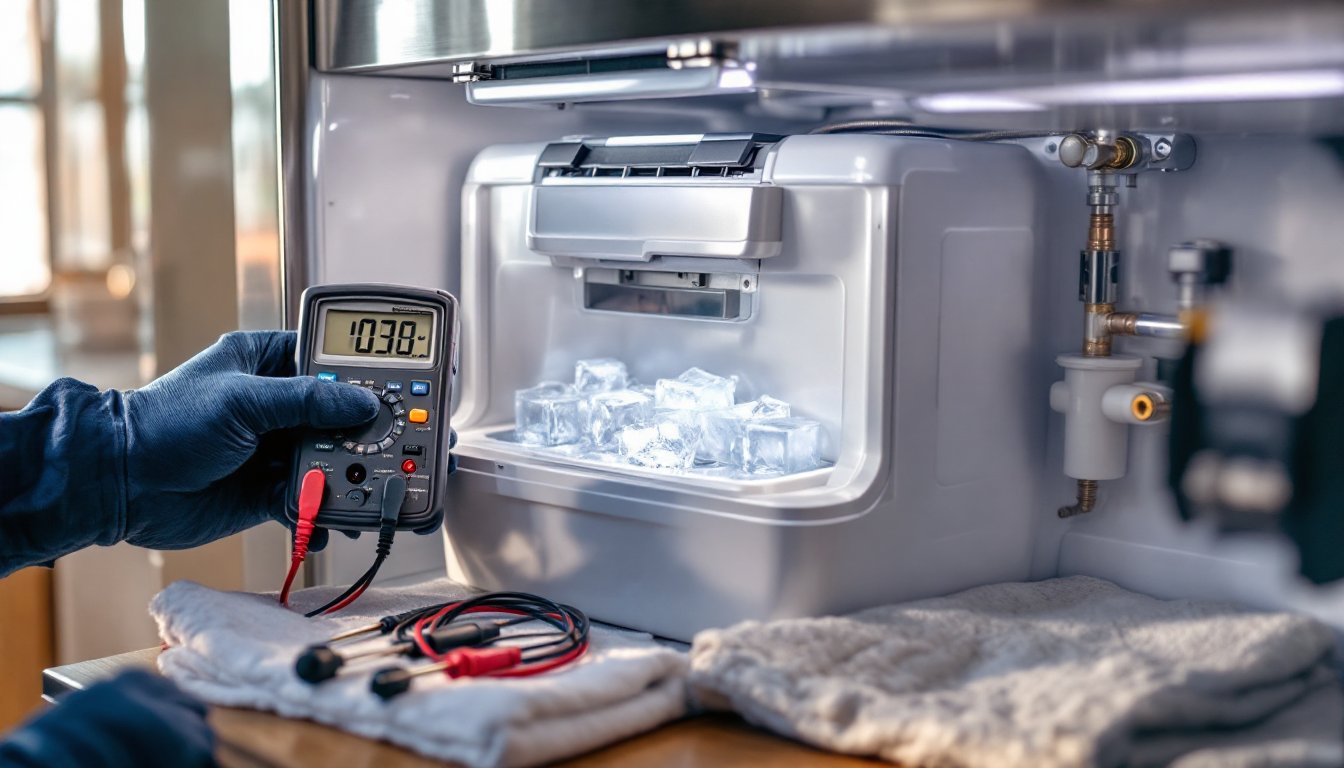
- Test the water supply line, inlet valve, ice maker module, and thermostat using a multimeter and manual cycle test to identify the exact component causing failure before ordering replacement parts.
- Replace your refrigerator’s water filter every six months (quarterly in hard water areas) and maintain freezer temperature at 0°F to 5°F to prevent most ice maker issues and extend appliance lifespan.
- When troubleshooting confirms a failed ice maker module, replacement is straightforward with universal aftermarket units costing $40–$80, and the new unit typically produces ice within 6–12 hours.
Common Signs Your GE Ice Maker Needs Repair
Recognizing symptoms early prevents minor issues from becoming expensive failures. Most GE refrigerator ice maker problems announce themselves clearly.
No ice production whatsoever tops the list. If the bin sits empty for 24+ hours and the unit doesn’t cycle, the ice maker module, water supply, or control board has likely failed. Check whether the freezer maintains proper temperature (0°F to 5°F), warm temps prevent freezing regardless of mechanical function.
Small, misshapen, or hollow cubes indicate water pressure issues or a partially clogged fill valve. Properly formed ice cubes should be solid and uniform. When cubes look like tiny top hats or have air pockets, the fill cycle isn’t delivering enough water.
Constant cycling without ejecting ice suggests a jammed ejector arm or faulty motor. Listen for repetitive humming or clicking every 90–120 seconds. That’s the module attempting to harvest ice that hasn’t released from the mold.
Leaking water around or beneath the ice maker points to a cracked water line, loose fitting, or defective inlet valve. Even minor drips can lead to ice buildup inside the freezer compartment, which blocks airflow and reduces efficiency.
Unusual noises, grinding, squealing, or loud clicking, mean mechanical components are wearing out or obstructed. GE Profile refrigerator ice makers should operate with a quiet hum and occasional clatter as cubes drop. Anything louder warrants investigation.
Essential Tools and Safety Precautions
GE refrigerator repair ice maker work requires minimal specialized equipment. Gather these items before starting:
Tools needed:
- Multimeter (digital preferred) for testing electrical continuity and voltage
- 1/4-inch nut driver or socket set for removing ice maker mounting screws
- Adjustable wrench for water line connections
- Flathead and Phillips screwdrivers
- Towels and a shallow pan to catch water when disconnecting lines
- Flashlight or headlamp for tight freezer compartments
- Bucket for collecting residual water
Safety gear:
- Work gloves to protect hands from sharp edges and cold surfaces
- Safety glasses when working overhead or with spring-loaded components
Critical safety steps: Always unplug the refrigerator or shut off the dedicated circuit breaker before beginning work. Water and electricity don’t mix, and ice makers operate on 120V household current. Locate the unit’s data plate (usually inside the fresh food compartment) to confirm model number and specifications before ordering parts.
Clear the freezer of food items and place them in coolers with ice packs. Most repairs take 30–90 minutes, but preparation prevents spoilage if troubleshooting takes longer. Keep the freezer door closed as much as possible to maintain temperature.
Turn off the water supply to the refrigerator at the shut-off valve, typically located under the sink or behind the fridge. This prevents flooding when disconnecting water lines. Have towels ready, even drained lines contain residual water.
Step-by-Step Troubleshooting Process
Systematic diagnosis identifies the root cause without replacing parts unnecessarily. Start with the simplest checks and progress to component testing.
Checking the Water Supply Line
Verify water flow first. Locate the 1/4-inch supply line running from the household plumbing to the refrigerator. Inspect the entire length for kinks, crushing, or freezing. If the line runs through an unheated space or against the back wall of the freezer, ice can block water flow.
Disconnect the supply line at the inlet valve (back of the fridge, lower section) using an adjustable wrench. Place a bucket underneath and turn the water supply back on briefly. Water should flow freely at 20–120 psi. Weak dribbling indicates a clogged filter, crimped line, or low household pressure.
Check the water filter. GE recommends replacing filters every six months, but hard water areas may require quarterly changes. A clogged filter restricts flow to the ice maker and water dispenser. Remove the filter (location varies by model, consult the user manual) and inspect for discoloration or sediment buildup. Run the ice maker without the filter temporarily to rule it out as the culprit.
Inspect the inlet valve at the back of the refrigerator. This solenoid-operated valve opens when the ice maker calls for water. Use the multimeter to test valve coils for continuity, readings should be 200–500 ohms. No continuity means a failed valve that needs replacement. Even with proper electrical function, mineral deposits can clog valve screens. Remove and rinse screens under running water, though replacement is often more reliable.
According to experts at Good Housekeeping, regular appliance maintenance including water line inspection prevents most ice maker failures.
Testing the Ice Maker Module
The ice maker module contains the thermostat, motor, and control circuitry. Failures here stop ice production completely or cause erratic behavior.
Perform the manual cycle test. Most GE ice makers have a test button or rotating arm on the front or side of the module. With power restored, press and hold the test button for three seconds (or manually rotate the gear until it clicks). The module should advance through a full harvest cycle: ejector arm rotates, mold warms slightly, and water fills the tray. Listen for the motor humming and watch for arm movement.
If nothing happens, check for 120V AC power at the ice maker harness connector using the multimeter. No voltage indicates a control board or wiring fault, more complex territory that may require professional help.
Test the mold thermostat (also called the ice thickness sensor). This small component measures temperature to determine when ice is frozen solid. With the multimeter set to ohms, check continuity when the mold is warm (above 15°F). It should show continuity. When frozen (below 10°F), it should open (no continuity). Reversed or constant readings mean the thermostat has failed.
Inspect the ejector arm for obstructions or ice jams. Remove loose ice cubes and check that the arm rotates freely. Frozen clumps often wedge behind the arm, preventing rotation. Pour warm water over stubborn buildup to melt it away.
Check the optical sensor (on newer models). Some GE Profile refrigerators use an infrared emitter/detector instead of a mechanical arm to detect ice levels. Dirt, frost, or ice buildup on the sensor causes false “bin full” readings. Wipe gently with a soft, damp cloth, avoid harsh cleaners that can damage the lens.
Detailed appliance troubleshooting methods appear regularly in technical guides from Popular Mechanics, which emphasize methodical diagnosis over part swapping.
How to Replace a Faulty GE Ice Maker
When troubleshooting confirms a failed module, replacement is straightforward. GE ice makers are designed for homeowner installation without special tools.
Order the correct replacement part. Match the model number from the refrigerator data plate to the ice maker assembly. GE part numbers vary between standard and Profile lines. Universal aftermarket units work for many models and typically cost $40–$80 versus $90–$150 for OEM parts. Choose based on warranty needs and budget.
Remove the old ice maker:
- Unplug the refrigerator and shut off water supply
- Empty the ice bin completely and remove it from the freezer
- Locate the mounting bracket screws (usually two or three) holding the ice maker to the freezer wall
- Disconnect the wire harness by depressing the locking tab and pulling gently
- Lift the unit off the mounting bracket, it may resist slightly due to ice buildup around the water fill tube
- If equipped, disconnect the water fill tube from the back of the module (some models have an integrated tube that stays with the freezer)
Install the new ice maker:
- Connect the wire harness to the new unit until it clicks into place
- Align the mounting bracket holes and secure with the original screws, don’t overtighten, as plastic threads strip easily
- Connect the fill tube, ensuring the rubber grommet seals properly (leaks here cause ice buildup)
- Replace the ice bin
- Restore water supply and power
Initial startup: The new ice maker typically takes 6–12 hours to produce the first batch. During the first cycle, discard the initial batch to flush any manufacturing residue or debris. Monitor for proper fill level, the mold should fill to just below the top edge. Overfilling causes oversized cubes that jam: underfilling produces hollow cubes.
Kitchen appliance best practices from sources like The Kitchn recommend running three full cycles and discarding the ice to ensure water quality.
Preventive Maintenance Tips to Avoid Future Issues
Proactive care extends ice maker lifespan and prevents repeat failures. Build these tasks into a regular maintenance schedule.
Replace the water filter on schedule. Set a reminder for every six months. Hard water areas with high mineral content benefit from quarterly changes. Clogged filters reduce water pressure, forcing the inlet valve and ice maker to work harder, which accelerates wear.
Clean the ice bin monthly. Remove the bin, wash with mild dish soap and warm water, and dry thoroughly before reinstalling. Mineral deposits and mold can accumulate on bin walls, affecting ice taste and hygiene.
Inspect water lines annually. Check for brittleness, cracks, or mineral buildup. Copper and braided stainless lines last longest: plastic tubing degrades faster and should be inspected more frequently. Replace any line showing signs of wear.
Level the refrigerator. Use a torpedo level on the top surface. The unit should be level side-to-side and tilted slightly back (about 1/4 inch over the depth) to ensure doors close properly. Poor leveling affects ice maker performance and water distribution.
Maintain proper freezer temperature. Keep the setting at 0°F to 5°F. Warmer temps prevent ice formation: colder settings can cause the ice maker to freeze solid and malfunction. Use a standalone freezer thermometer rather than trusting the built-in display alone.
Clear freezer vents. Don’t block air circulation with overpacked food. Proper airflow maintains consistent temperature and prevents localized freezing that can damage the ice maker.
Cycle the ice maker monthly even if ice demand is low. Prolonged inactivity allows seals to dry out and mechanisms to stiffen. Run a full cycle and discard the ice to keep components lubricated and functional.
When GE Profile refrigerator ice maker not working becomes a recurring problem even though maintenance, consider water quality issues. Whole-house filtration or a point-of-use system protects not just the ice maker but all appliances from mineral damage. Initial cost runs $150–$500 depending on system type, but reduces long-term appliance repairs significantly.
Most GE refrigerator ice maker repairs fall within the skill range of patient homeowners willing to follow systematic troubleshooting. Knowing when to call a professional matters too, if control board diagnostics reveal complex electrical faults, or if refrigerant system issues affect freezer temperature, a licensed appliance technician with proper tools and training delivers better outcomes than DIY attempts. For straightforward mechanical and water supply problems, though, these steps return an ice maker to reliable service without the service call expense.