When your Electrolux refrigerator starts acting up, it doesn’t always mean you need to call a technician or drop hundreds of dollars on a service visit. Many common issues, from temperature fluctuations to odd noises, can be diagnosed and fixed with basic tools and a little know-how. This guide walks you through the most frequent Electrolux refrigerator problems, shows you how to tackle them safely, and helps you decide when a repair is within DIY reach and when it’s time to bring in a pro. Whether you’re dealing with a warm fridge, a leaky ice maker, or a unit that sounds like it’s hosting a rock concert, you’ll find practical, step-by-step solutions here.
Table of Contents
ToggleKey Takeaways
- Many common Electrolux refrigerator repair issues, including temperature fluctuations, water leaks, and ice maker problems, can be safely fixed with basic tools and DIY troubleshooting.
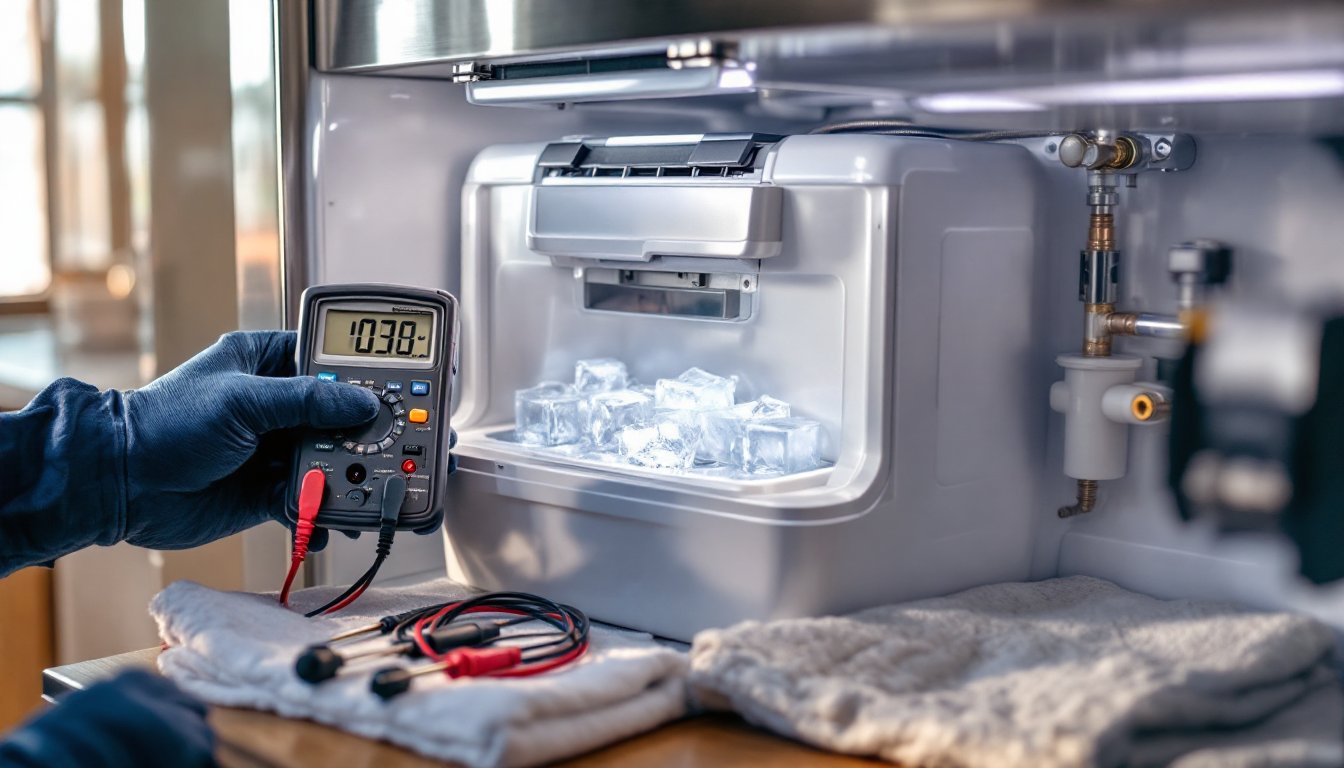
- Always unplug your refrigerator and use a multimeter to test electrical components before attempting any repair work to avoid electrical shock and equipment damage.
- For cooling problems, start with simple fixes like cleaning condenser coils, checking thermostat settings, and testing the evaporator fan before considering professional service.
- Clear clogged defrost drains with warm water and a turkey baster to prevent water leaks—this is one of the easiest and most common Electrolux refrigerator repairs.
- Unusual noises like clicking or rattling often signal worn components or loose parts that can be identified with basic inspection and fixed in under an hour.
- Leave refrigerant leaks, compressor failures, and sealed-system work to certified professionals, as DIY attempts can damage the unit and void your warranty.
Common Electrolux Refrigerator Problems and Their Causes
Electrolux refrigerators are generally reliable, but like any appliance, they have their weak points. Understanding what typically goes wrong can save you time and frustration.
Temperature issues top the list. If food’s spoiling faster than usual or ice cream stays soft, the problem often traces back to a faulty thermostat, evaporator fan, or condenser coils caked with dust. Electrolux models with electronic controls may also experience sensor failures that throw off temperature readings.
Water leaks are another frequent complaint. These usually stem from a clogged defrost drain, a cracked drain pan, or a damaged water line feeding the ice maker or dispenser. Sometimes it’s as simple as the fridge not being level, causing condensation to pool and drip.
Ice maker malfunctions range from no ice production to jammed dispensers. Common culprits include a frozen fill tube, a failed water inlet valve, or a stuck ejector arm. Electrolux units with built-in water filters may also suffer from reduced flow if the filter hasn’t been changed in six months or more.
Unusual noises, buzzing, clicking, rattling, can signal anything from a worn evaporator fan motor to loose components inside the compressor area. Some noise is normal (compressor cycling, defrost heater clicking), but persistent or loud sounds warrant investigation.
Essential Tools and Safety Precautions for Refrigerator Repair
Before you crack open any panel, gather your tools and prep your workspace. Refrigerator repair isn’t rocket science, but it does involve sharp edges, electrical components, and refrigerant lines that can injure you or damage the unit if mishandled.
Tools you’ll need:
- Multimeter (digital preferred) for testing continuity and voltage
- Nut driver set (1/4″ and 5/16″ are most common)
- Phillips and flathead screwdrivers
- Adjustable wrench or socket set
- Flashlight or headlamp
- Shop vacuum with brush attachment (for cleaning coils)
- Bucket and towels (for water leaks)
- Level (to check fridge alignment)
Safety first:
- Unplug the refrigerator before any repair work. If you can’t reach the outlet, flip the breaker. Working on a live appliance is a fast track to electrical shock.
- Wear work gloves when handling coils or sharp metal edges. Safety glasses are smart if you’re working underneath or dealing with compressed springs.
- Never puncture refrigerant lines. If you suspect a refrigerant leak (oily residue, hissing sound), stop and call a pro. Refrigerant handling requires EPA certification.
- Keep the fridge unplugged for at least five minutes before testing components with a multimeter. Capacitors can hold a charge and deliver a nasty jolt.
- If you’re pulling the unit away from the wall, protect your flooring with cardboard or a moving blanket. Fridges are heavy, get a helper if you’re not confident moving it solo.
How to Fix a Refrigerator That Won’t Cool Properly
A warm fridge is more than inconvenient, it’s a food-safety issue. Start with the simplest fixes before diving into component replacement.
Step 1: Check the thermostat setting. It sounds obvious, but someone may have bumped it. Set it to the manufacturer’s recommended range (usually 37–40°F for the fridge, 0–5°F for the freezer) and wait four hours to see if temperatures stabilize.
Step 2: Inspect the condenser coils. These are typically located on the back or beneath the unit. If they’re coated in dust, the fridge can’t expel heat efficiently. Unplug the unit, vacuum the coils with a brush attachment, and wipe them down. This alone can restore cooling in many cases.
Step 3: Test the evaporator fan. Open the freezer and listen for airflow. If you hear nothing, the evaporator fan motor may be dead. Access it by removing the back panel inside the freezer (usually held by screws). Spin the fan blade by hand, if it’s stiff or doesn’t turn, the motor needs replacing. Use a multimeter to check for continuity across the motor terminals. No continuity? Time for a new motor (around $50–$100 for the part).
Step 4: Check the condenser fan (if applicable). On models with rear-mounted coils, a small fan near the compressor helps cool the system. If it’s not running, test it the same way you would the evaporator fan.
Step 5: Assess the start relay and overload. If the compressor won’t run at all, the start relay, a small box plugged onto the compressor, may have failed. Pull it off and shake it. If you hear rattling, it’s toast. Testing with a multimeter (between start and run terminals) should show continuity. A new relay runs $15–$30 and snaps on in seconds.
If none of these steps restore cooling, you’re likely looking at a compressor or sealed-system issue, both of which require professional refrigerator repair services.
Repairing Water Leaks and Ice Maker Issues
Water pooling under your Electrolux fridge or an ice maker that won’t cooperate are two of the most common, and fixable, problems.
Water Leaks
Most leaks originate from one of three places: the defrost drain, the water line, or the drain pan.
Clogged defrost drain: During the defrost cycle, melted frost drains through a small tube inside the freezer. If it’s blocked by food particles or ice, water backs up and leaks onto the floor. To clear it, unplug the fridge, remove the back panel in the freezer, and locate the drain opening (usually at the bottom). Flush it with warm water using a turkey baster or a length of flexible tubing. A mix of warm water and a little dish soap helps dissolve gunk.
Cracked drain pan: The pan sits under the fridge and catches defrost water, which then evaporates. If it’s cracked, water drips onto your floor. Pull the fridge out, remove the front kick plate, and slide out the pan. Inspect for cracks. Replacement pans cost $20–$40.
Damaged water line: If your Electrolux has a water dispenser or ice maker, check the plastic or braided steel line running to the back of the unit. Look for kinks, cracks, or loose fittings. Tighten connections with an adjustable wrench or replace the line if it’s damaged (typically $10–$25 at hardware stores).
Ice Maker Problems
No ice production: First, confirm the ice maker is actually turned on (look for a wire bail arm or a switch). Next, check water supply. Turn off the water line, disconnect it at the fridge, and let it run into a bucket. Low flow? Replace the water filter (Electrolux recommends every six months). If flow is fine but ice still won’t form, the water inlet valve may be clogged or failed. It’s located where the water line enters the fridge. Test it with a multimeter (should read 40–90 ohms). Replacement valves run $30–$60.
Jammed or slow ice: A frozen fill tube (the small copper or plastic tube delivering water to the ice mold) is a common issue in Electrolux models. If airflow is blocked or the freezer’s too cold, the tube ices over. Thaw it carefully with a hairdryer on low heat, don’t melt plastic components. For guidance on leak fixes, detailed walkthroughs can help you confirm your diagnosis.
Troubleshooting Unusual Noises and Vibrations
Refrigerators hum, click, and occasionally whoosh, that’s normal. But if yours sounds like it’s grinding gears or rattling loose, it’s time to investigate.
Buzzing or humming: A low hum from the compressor is expected. If it’s louder than usual or accompanied by vibration, check that the fridge is level. Use a torpedo level on top of the unit and adjust the front leveling legs (usually twist them by hand or with a wrench). The fridge should tilt slightly back so the doors close on their own. If the noise persists, the compressor mounts may be worn, which is a job for a tech.
Clicking: Repeated clicking often means the start relay is trying, and failing, to kick the compressor on. Test and replace the relay as described in the cooling section. Occasional clicks during defrost cycles are normal.
Rattling: Check for loose components. Pull the fridge out and inspect the drain pan, condenser fan, and any plastic covers or grilles. Tighten screws and ensure nothing’s rubbing against the compressor.
Squealing or grinding: This usually points to a failing evaporator or condenser fan motor. Access the fans (as outlined earlier) and spin the blades. If they’re stiff or wobbly on the shaft, the motor bearings are shot. Replacement is straightforward but requires removing a few screws and unplugging wire harnesses.
Water dripping or sloshing: Electrolux models with an automatic defrost feature may produce brief sloshing sounds as water drains. If it’s constant, revisit the defrost drain and drain pan.
When to Call a Professional vs. DIY Repair
Not every refrigerator issue is a DIY win. Knowing your limits keeps you safe and can actually save money in the long run.
DIY-friendly repairs:
- Cleaning condenser coils
- Replacing door gaskets
- Swapping out a start relay, thermostat, or fan motor
- Clearing a clogged defrost drain
- Changing water filters and inlet valves
- Adjusting leveling legs or tightening loose parts
These tasks require basic tools, minimal disassembly, and don’t involve refrigerant or high-voltage components. Parts are widely available online or at appliance stores, and most can be installed in under an hour.
Call a pro for:
- Compressor replacement. If the compressor has failed, the repair often costs $300–$600 in labor and parts, sometimes more than the fridge is worth. A technician can assess whether replacement or a new unit makes sense.
- Refrigerant leaks. Handling refrigerant requires EPA certification. DIY attempts can damage the sealed system and void warranties.
- Sealed-system work. Anything involving brazing, evacuating, or recharging the refrigerant loop is strictly professional territory.
- Electrical issues beyond basic components. If you’re dealing with control boards or complex wiring and aren’t confident with a multimeter, a tech can diagnose faster and safer.
- Warranty coverage. If your Electrolux is still under warranty, DIY repairs may void it. Check your paperwork before opening panels.
Many Electrolux dishwasher repair and refrigerator service calls can be avoided with routine maintenance, but when in doubt, get a quote. Most techs charge a diagnostic fee (often $75–$150) that’s applied to the repair if you proceed. For complex or high-cost repairs, reaching out to professionals experienced in appliance troubleshooting ensures the job is done right.
Conclusion
Most Electrolux refrigerator issues fall within DIY reach if you’re methodical, safety-conscious, and willing to spend an hour or two troubleshooting. Start with the simplest fixes, clean coils, check thermostats, clear drains, and work your way up to component testing and replacement. Keep your multimeter handy, respect the sealed system, and know when to hand things off to a licensed tech. With the right approach, you can extend your fridge’s life, avoid service fees, and keep your kitchen running smoothly.