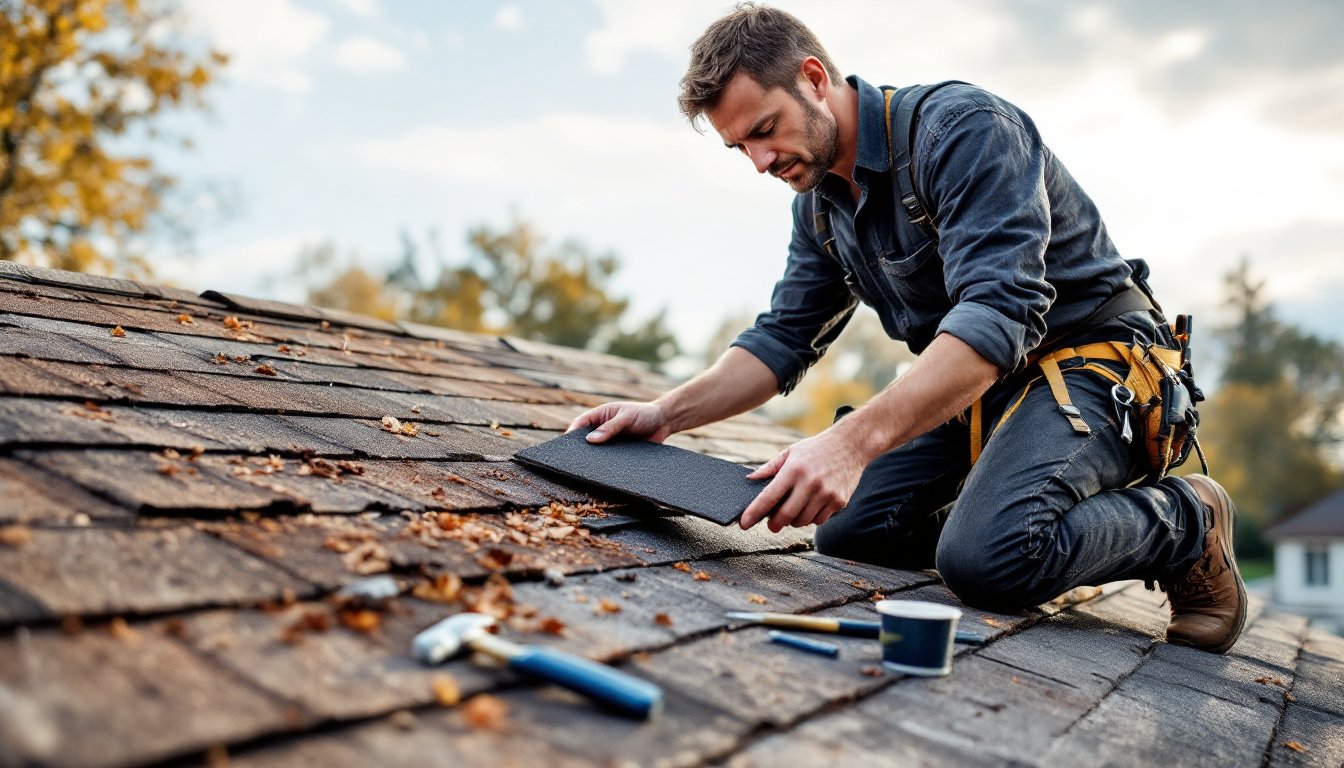
EPDM rubber roofing is tough, flat roofs on garages, additions, and low-slope homes often rely on this durable membrane to keep water out for decades. But even the best EPDM eventually develops leaks, tears, or seam failures, especially around flashing and penetrations. The good news? Most EPDM repairs are well within DIY reach if you catch them early. This guide walks through identifying damage, gathering the right materials, and patching your rubber roof correctly so it stays watertight without calling in a crew.
Table of Contents
ToggleKey Takeaways
- EPDM roof repair is achievable for homeowners with early detection and proper surface preparation, which is the most critical step to ensure patches bond securely.
- Common EPDM roof damage includes seam separation, punctures, flashing failures, and UV-induced cracking—inspect your roof twice yearly to catch issues before they become costly leaks.
- Use only EPDM-compatible products like primer, adhesive, and sealant from trusted brands; generic roofing cement or silicone won’t bond to rubber and will fail.
- Round patch corners and extend them at least 4 inches beyond the damage in all directions, then roll firmly from center outward to eliminate air bubbles and ensure full contact.
- Allow 24 to 48 hours for EPDM repairs to cure completely before foot traffic, and avoid walking on the roof during heavy rain to prevent compromising the bond.
- Regular maintenance—including annual cleaning, trimming overhanging branches, and resealing flashing every 3 to 5 years—can extend your EPDM roof’s lifespan to 30+ years and prevent expensive repairs.
What Is EPDM Roofing and Why Does It Need Repair?
EPDM (ethylene propylene diene terpolymer) is a synthetic rubber membrane commonly used on flat or low-slope roofs. It comes in large sheets, often 10, 20, or even 45 feet wide, minimizing seams and simplifying installation. Most residential EPDM is 45 or 60 mils thick and can last 20 to 30 years when properly maintained.
EPDM is popular because it resists UV degradation, handles temperature swings without cracking, and costs less than TPO or PVC membranes. It’s typically black, though white versions exist for better reflectivity in hot climates.
Even though its durability, EPDM isn’t invincible. The membrane can puncture from falling branches, foot traffic, or hail. Seams weaken over time, especially if they weren’t bonded with tape or adhesive properly during installation. Flashing around vents, skylights, and parapets often fails first, allowing water to migrate under the membrane. UV exposure gradually hardens the rubber, making it brittle and prone to cracking after 15 to 20 years. Regular roof repair tasks help extend lifespan, but once damage occurs, prompt patching prevents minor leaks from becoming major structural issues.
Common EPDM Roof Problems and Damage Signs
Seam separation is the most frequent EPDM failure. Seams rely on either tape or liquid adhesive, and both can degrade. Look for gaps where sheets meet, water stains on the ceiling below are a telltale sign.
Punctures and tears happen from sharp debris, HVAC work, or even careless foot traffic. Small holes might not leak immediately, but they will once debris blocks drainage and water pools.
Flashing failures occur where the EPDM meets vertical surfaces, chimneys, vent pipes, parapet walls. The caulk or sealant cracks, and water slips behind the membrane. Check these areas first if you see interior leaks near walls or fixtures.
Shrinkage is less common with modern EPDM, but older roofs can pull away from edges and fasteners, especially at corners. This exposes the roof deck to moisture.
Blistering indicates trapped moisture or air between the membrane and substrate. Small blisters aren’t urgent, but large ones can rupture and leak.
Surface cracking from UV exposure usually shows up after 15+ years. Fine cracks aren’t an emergency, but deep fissures need patching before they split.
Inspect your EPDM twice a year, spring and fall, and after any severe weather. Walk the roof carefully (EPDM can be slippery when wet) and look for standing water, loose seams, and damaged flashing. Interior water stains, mold, or musty odors in the attic signal that a leak is already active.
Essential Tools and Materials for EPDM Roof Repair
Materials:
- EPDM patch material (same thickness as your roof, 45 or 60 mil)
- EPDM primer (cleans and preps the surface for adhesion)
- EPDM adhesive or seam tape (both work: tape is faster, adhesive is more flexible)
- Lap sealant or caulk rated for EPDM (for edges and flashing)
- Cleaning solvent (isopropyl alcohol or manufacturer-recommended cleaner)
- Roller or hand roller (3-inch seam roller for pressing patches)
Tools:
- Utility knife with fresh blades
- Wire brush or stiff-bristle scrub brush
- Rags or lint-free towels
- Measuring tape
- Straight edge or metal ruler
- Scissors or tin snips (for cutting patch material)
- Caulking gun (if using tube sealant)
- Paintbrush or foam applicator (for primer and adhesive)
Safety Gear:
- Non-slip footwear (rubber soles)
- Work gloves (rubber or nitrile)
- Safety glasses
- Knee pads (flat roofs are hard on knees)
- Fall protection if your roof is over one story (harness, anchor, or guardrails)
EPDM-specific products matter. Don’t use generic roofing cement or silicone caulk, they won’t bond to rubber and can cause further damage. Brands like Firestone, Carlisle, and GenFlex manufacture compatible repair products. If you’re unsure of your roof’s brand, look for markings on the membrane edge or check with the original installer.
Repair costs vary, but a basic patch kit runs $30 to $60. Larger repairs might need a 10-foot roll of membrane ($100 to $200) and a gallon of adhesive ($40 to $80). These figures fluctuate with regional pricing and material grade. For comparison, professional rubber roof repairs can cost significantly more depending on the extent of damage.
Step-by-Step EPDM Roof Repair Process
Cleaning and Preparing the Damaged Area
Surface prep makes or breaks the repair. EPDM won’t bond to dirt, oil, or old sealant, so this step is non-negotiable.
- Identify the damage. Mark the perimeter of the tear, puncture, or failed seam with chalk or a marker so you know the full extent.
- Clean the area. Use a wire brush or stiff scrub brush to remove dirt, moss, and loose debris. Wipe with a rag dampened in EPDM cleaning solvent or isopropyl alcohol. Scrub in a circular motion, working outward from the damage.
- Dry completely. Wait at least 15 to 30 minutes (longer if humid). The membrane must be bone-dry. Touch it, if it feels even slightly damp or cool, wait.
- Apply primer. Most EPDM adhesives and tapes require primer for a strong bond. Brush a thin, even coat over the cleaned area, extending at least 2 inches beyond the planned patch size. Let the primer dry per the manufacturer’s instructions (typically 5 to 15 minutes). It should be tacky but not wet.
- Inspect the substrate. If the decking below is soft, rotted, or water-damaged, you’ve got a bigger problem. Patch the membrane temporarily, then plan to replace the damaged decking and membrane section. This is structural work, consider hiring a pro if you’re not comfortable with it.
For membrane roof repair on other materials, the cleaning process is similar, but always verify product compatibility.
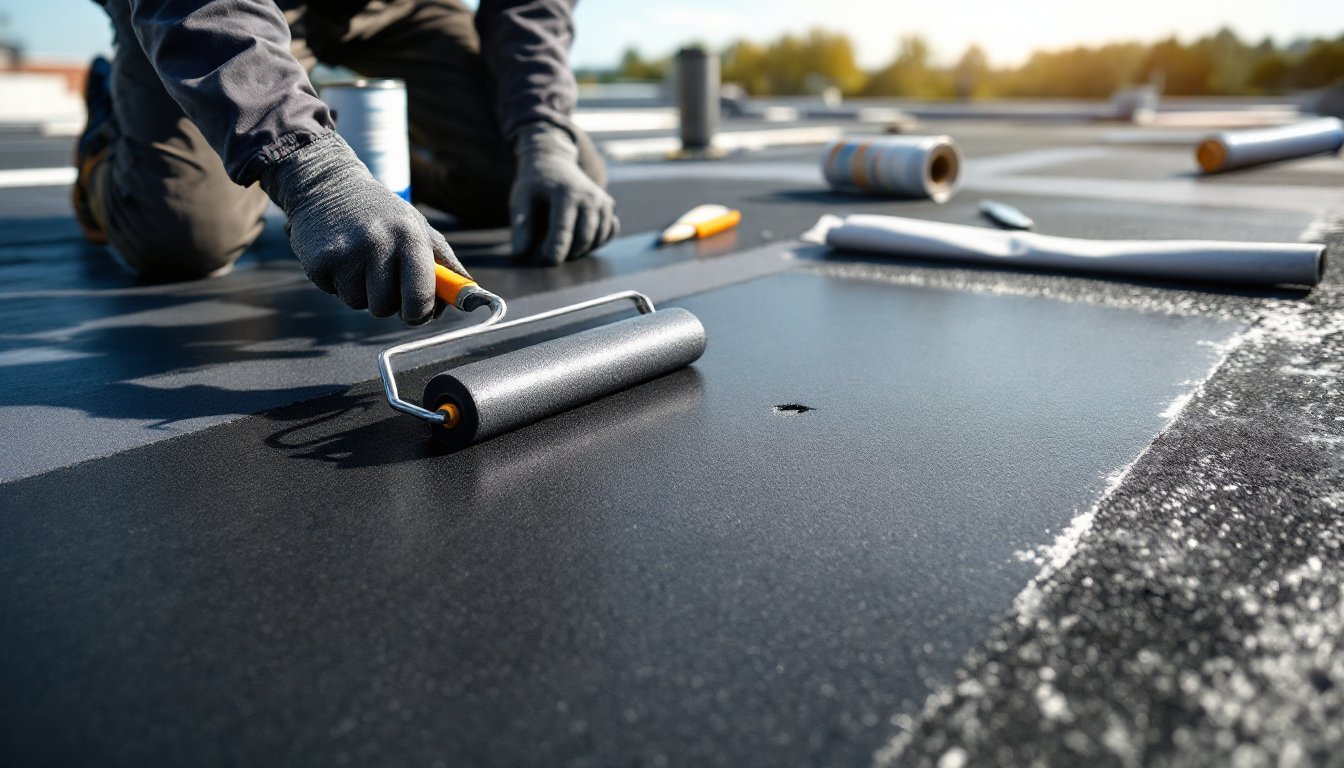
Applying Patches and Sealants Correctly
Once the surface is prepped, the actual patching is straightforward, but precision matters.
Cutting the patch:
- Measure the damaged area, then cut your EPDM patch material at least 4 inches larger in all directions. For a 3-inch tear, you need a patch at least 11 inches long.
- Round the corners with scissors. Sharp corners can lift over time.
- Clean and prime the patch material’s underside just as you did the roof surface.
Applying the patch:
- If using EPDM tape: Peel the backing halfway, align the patch over the damage, press the exposed half down firmly, then peel the rest and press. Work from the center outward to avoid trapping air bubbles.
- If using EPDM adhesive: Apply a thin, even coat to both the roof and the patch. Wait for the adhesive to become tacky (follow the can’s instructions, usually 5 to 10 minutes). Position the patch carefully (you won’t get a second chance once it touches), then press down firmly.
- Roll the patch. Use a 3-inch hand roller or a J-roller to press out air bubbles and ensure full contact. Roll from the center outward in overlapping strokes. Apply firm, even pressure, don’t just tap it down.
Sealing edges:
- Once the patch is down, apply EPDM lap sealant around the perimeter. Use a caulking gun or squeeze tube to lay a smooth, continuous bead.
- For seam repairs, apply sealant along both sides of the seam tape or adhesive bond.
- Check flashing around vents and edges. If the old caulk is cracked, scrape it out, clean the joint, and apply fresh EPDM-compatible caulk.
Curing time:
Most EPDM adhesives and sealants need 24 to 48 hours to fully cure. Avoid walking on the patch during this period. Check the weather, rain within 24 hours can compromise the bond. If rain is forecast, wait for a dry spell.
Testing:
After the patch cures, inspect it for air pockets or lifting edges. Gently tug the edge, it shouldn’t budge. If you spot any gaps, apply more sealant and roll again. For peace of mind, trusted resources often recommend monitoring patches after the first heavy rain.
Preventive Maintenance Tips for Long-Lasting EPDM Roofs
Regular maintenance extends EPDM life and catches small issues before they become leaks.
Inspect twice a year. Walk the roof in spring and fall. Look for seam separation, punctures, and debris accumulation. Clear leaves, branches, and dirt, organic matter traps moisture and accelerates weathering.
Clean the membrane. Wash the roof annually with a soft brush and mild detergent. Rinse thoroughly. Avoid pressure washers, they can damage seams and flashing.
Check flashing and penetrations. Reseal around vents, skylights, and parapets every 3 to 5 years, even if they look fine. Caulk is cheap: water damage isn’t.
Trim overhanging branches. Keep trees at least 6 feet away. Falling limbs are the leading cause of punctures.
Address ponding water. If water sits for more than 48 hours after rain, your roof may need additional drainage or tapered insulation. Chronic ponding shortens EPDM life and stresses seams.
Recoat if necessary. After 15 to 20 years, consider an EPDM coating, acrylic or silicone formulas add UV protection and can extend life by 5 to 10 years. This is optional but cost-effective compared to full replacement.
Document repairs. Keep a log of patches, sealant applications, and inspection dates. If you sell the home, maintenance records reassure buyers.
Know when to call a pro. If you find widespread cracking, large seam failures, or significant ponding, a professional assessment may be wise. For complex projects or code-related questions, platforms like Angi can connect you with local contractors who specialize in flat roof systems. Minor patches? DIY is fine. Major surgery? Get a second opinion before committing to materials and labor.