Spotting a damaged shingle or a suspicious leak doesn’t mean you’re facing a full roof replacement. Most asphalt shingle problems, cracks, curls, missing tabs, can be repaired by a confident DIYer with a free afternoon and basic tools. Asphalt shingles are the most common roofing material in North America, covering about 80% of residential roofs, so knowing how to patch them up saves both money and headaches. This guide walks through identifying damage, gathering the right materials, and executing repairs that’ll last years, not months.
Table of Contents
ToggleKey Takeaways
- Asphalt roof repair for common issues like cracked, curled, or missing shingles can be completed by DIYers with basic tools in just a few hours, saving hundreds on professional contractor costs.
- Proper identification of damage types—cracked shingles from thermal cycling, curling from poor ventilation, and missing tabs from wind damage—determines whether a quick repair or full replacement is needed.
- Essential materials including matching replacement shingles, 1¼-inch roofing nails, and asphalt-based roofing cement must be gathered before starting work, and the job should only be tackled on mild, dry days between 50–85°F.
- Safety gear including non-slip shoes, work gloves, fall protection harness for steep roofs, and a properly rated ladder is non-negotiable when performing asphalt roof repair at height.
- Call a professional roofer for damage exceeding 20% of a roof section, steep pitches over 8/12, flashing issues, or roofs older than 20 years, as these situations require expertise beyond DIY capability.
- Regular roof inspections twice yearly in spring and fall, plus documentation of storm damage with photos, can prevent minor asphalt roof repair issues from escalating into expensive full-roof replacements.
Understanding Common Asphalt Shingle Damage
Asphalt shingles fail in predictable ways, and recognizing the pattern helps determine whether you’re looking at a quick fix or a bigger issue.
Cracked shingles typically result from thermal cycling, repeated expansion and contraction as temperatures swing. You’ll see straight or diagonal cracks running through individual tabs. These are cosmetic at first but let water penetrate the underlayment if ignored.
Curling or cupping happens when shingle edges lift or the center buckles. This signals either poor attic ventilation (heat buildup accelerates aging) or shingles nearing the end of their 20–30 year lifespan. Curled shingles catch wind like sails, making them prone to tearing off entirely.
Missing shingles are obvious, bare spots where tabs have blown away. High winds, improper nailing during installation, or brittle aged shingles are the usual culprits. A few missing shingles aren’t catastrophic, but exposed underlayment degrades fast under UV and weather.
Granule loss shows up as bald patches where the protective mineral coating has worn away, exposing the asphalt mat beneath. Check gutters for granule accumulation, it’s normal in the first year or two, but heavy shedding later indicates the shingles are deteriorating.
Lifted or loose shingles that haven’t fully detached yet often result from poor adhesive seal or fastener corrosion. Catch these early and you can re-secure them before they become missing shingles.
Inspect from the ground with binoculars first. Only get on the roof if you’re comfortable with ladder safety and have appropriate fall protection. Asphalt shingles are slippery, especially when wet or covered in morning dew.
Essential Tools and Materials for Asphalt Roof Repair
Gather everything before climbing up, multiple trips waste time and test your patience.
Tools:
- Flat pry bar (12-inch works well for lifting shingle tabs without damage)
- Utility knife with hook blades (for cutting shingles: hook blades won’t slip)
- Caulk gun for roofing cement
- Hammer (16 oz. is standard)
- Ladder rated for your weight plus 25% (Type I minimum, Type IA better)
- Roofing nail puller or cat’s paw for removing old nails
- Chalk line if you’re replacing multiple shingles in a row
Materials:
- Replacement shingles that match existing color and style (three-tab vs. architectural matters). Buy from the same manufacturer if possible: dye lots vary. A bundle covers about 33 square feet and costs $25–$40 depending on quality.
- Roofing nails: 1¼-inch galvanized or aluminum, with large 3/8-inch heads. Use four nails per shingle.
- Roofing cement (also called mastic or roof tar): Get a tube for small jobs or a gallon can for larger repairs. Asphalt-based formulas remain flexible after curing.
- Roofing adhesive or shingle tabs if you’re re-securing lifted shingles without replacing them.
Safety Gear (non-negotiable):
- Work gloves with grip palms
- Safety glasses (roofing cement spatters)
- Non-slip shoes with rubber soles (basketball shoes work better than work boots on shingles)
- Knee pads if you’ll be kneeling
- Fall protection harness and anchor for steep pitches (anything over 6/12 slope)
Work on a mild, dry day between 50°F and 85°F. Shingles become brittle in cold and too soft in heat, making them harder to handle without damage. Avoid windy days, lifted shingles can blow out of your hands, and you don’t want to become a liability yourself.
Step-by-Step: Repairing Minor Shingle Damage
Most homeowners can handle single-shingle repairs and small patches without professional help. Here’s how to tackle the two most common scenarios.
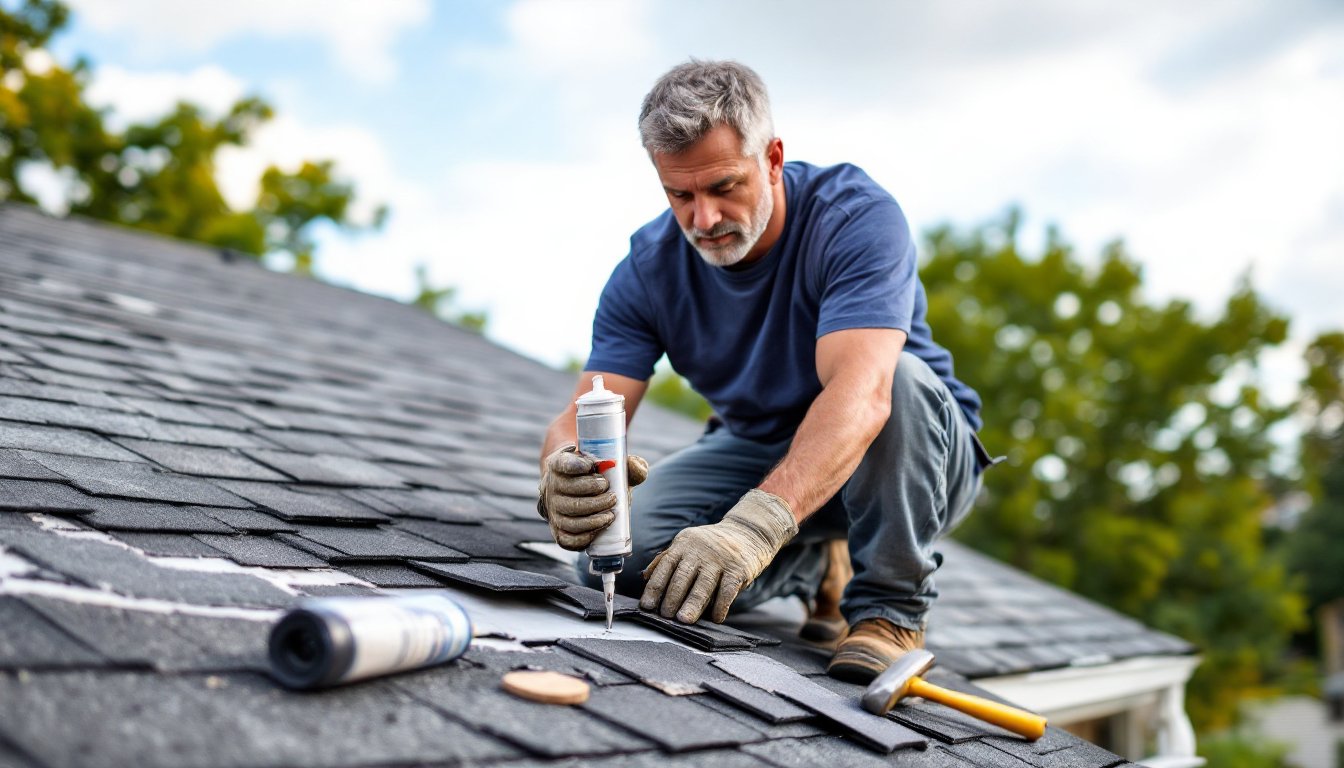
Fixing Cracked or Curling Shingles
Cracked shingles can be repaired in place if the pieces are still attached and the crack is smaller than an inch or two.
-
Clean the area. Brush away dirt and debris around the damaged shingle using a stiff brush. Remove any loose granules.
-
Apply roofing cement. Lift the cracked section gently with a flat pry bar. Slide the caulk gun nozzle underneath and apply a thick bead of roofing cement along the crack’s entire length. For curled edges, apply cement to the underside of the curl.
-
Press and secure. Push the shingle flat. If it won’t stay, weigh it down with a brick wrapped in a towel (to avoid scuffing) for a few hours while the adhesive sets.
-
Seal exposed edges. Dab a thin layer of roofing cement over the crack on the surface side, then sprinkle loose granules (collect them from the gutter) over the wet cement to blend the repair visually.
This fix works for shingles with surface cracks but structural integrity still intact. If the shingle tears when you press it or the crack runs the full width, replacement is smarter. Regular roof maintenance practices like clearing debris and inspecting after storms can catch these issues before they escalate.
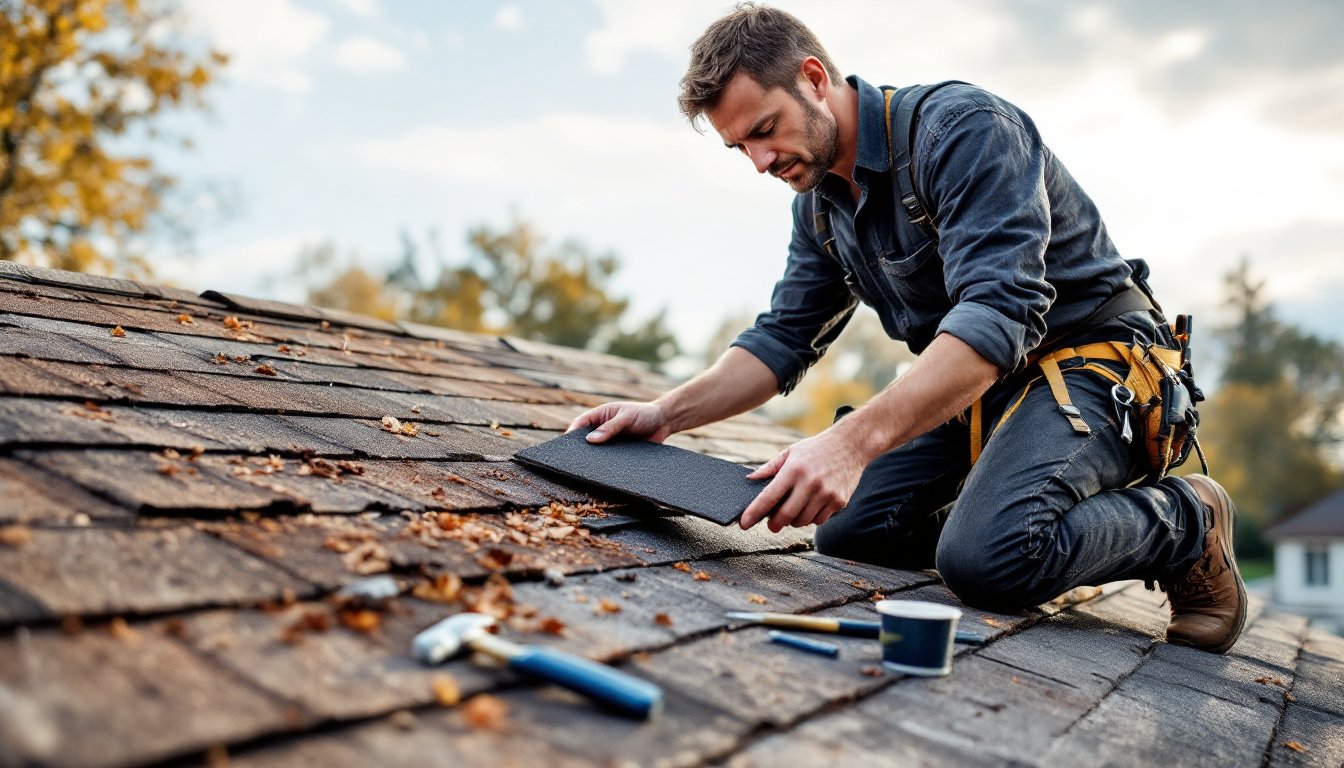
Replacing Missing or Blown-Off Shingles
Swapping out a damaged shingle takes about 15 minutes once you’ve done it a few times. Professional roof repair costs average $300–$900 depending on location and extent, but DIY materials rarely exceed $50 for minor fixes.
-
Remove damaged shingle. Lift the shingle tabs in the row above the damaged one using your flat pry bar, gently, to avoid tearing them. You’ll see the nails holding the damaged shingle (typically four nails across the top edge). Use the pry bar or nail puller to extract each nail. If a nail won’t budge, cut the shingle away and leave the nail head, it’ll be covered.
-
Prep the new shingle. Trim the replacement to size if needed (architectural shingles sometimes require custom cuts). Round the back corners slightly with your utility knife so the shingle slides into place more easily.
-
Slide the new shingle in. Position it so the tabs align with adjacent shingles. The top edge should sit just below the adhesive strip on the shingle above.
-
Nail it down. Drive four roofing nails through the new shingle’s nailing strip (the flat area about 5½ inches up from the bottom edge on three-tab shingles, slightly higher on architectural styles). Align nails with those in adjacent shingles. Don’t overdrive, the nail head should sit flush, not sink into the shingle.
-
Seal the overlaps. Lift the tabs above and apply a dime-sized dab of roofing cement under each corner where they overlap the new shingle. Press down firmly. This mimics the factory adhesive seal and prevents wind lift.
-
Check alignment. Step back (carefully) and confirm the repair blends in. Misaligned shingles create water channels and look sloppy.
If you’re replacing a shingle in the middle of a run, you may need to break the adhesive seal on multiple surrounding shingles. Work slowly, rushing tears tabs. For extensive damage involving several specialized roofing contractors can often complete larger repairs more efficiently than a DIYer tackling them piecemeal.
When to Call a Professional vs. DIY Repair
Knowing your limits isn’t defeat, it’s smart project management.
DIY-friendly repairs:
- Replacing fewer than 10–15 scattered shingles
- Fixing isolated cracks or curls
- Re-securing lifted shingles
- Patching small (under 2 square feet) areas of damage
- Single-story roofs with pitches under 6/12
Call a pro when:
- Damage is widespread. If more than 20% of a roof section is compromised, replacement or large-scale repair is more cost-effective than patching.
- You see signs of underlying issues. Sagging decking, soft spots when you walk, or water stains on interior ceilings indicate problems beyond the shingles, possibly rotted plywood sheathing or truss damage. These require structural assessment.
- The roof is steep or high. Pitches over 8/12 are dangerous without proper fall protection and experience. Two-story homes increase fall risk exponentially.
- Flashing is involved. Chimney flashing, valley flashing, or vent boot repairs require metalworking skills and proper sealing techniques. Botched flashing causes most chronic leaks.
- You’re uncomfortable with heights or tools. No shame here. A fall or improper repair costs more than hiring out from the start.
- The roof is older than 20 years. Repairs on aging roofs are band-aids. Get a professional assessment to determine remaining lifespan. Homeowner resources like seasonal maintenance guides can help evaluate overall roof condition.
Permit considerations: Most jurisdictions don’t require permits for minor shingle repairs (under 100 square feet in a 12-month period), but rules vary. Check with your local building department. Major repairs or re-roofing always need permits and often require licensed contractors.
Insurance claims: If storm damage is involved, document everything with photos before starting repairs. Some policies require professional inspections or won’t cover DIY work that fails. Read your policy or call your agent before breaking out the caulk gun.
Conclusion
Asphalt shingle repair isn’t rocket science, but it demands attention to detail and respect for safety. A few replaced shingles or patched cracks can buy years of protection at a fraction of a contractor’s cost. Inspect twice a year, spring and fall, and after major storms. Catching small problems early keeps them from becoming expensive emergencies that require tearing off half the roof.